Table of contents
Google Analytics email reports are an important part of your marketing efforts. Not only are they a great way to stay on top of what is happening in real-time, but you can also use them as helpful reports for clients or other people who need access to various data.
And the best thing about these reports is that you can automate them. Instead of having to manually create the reports every month, you can simply schedule them to be sent out as soon as they are generated!
Wondering how? In this article, we will provide a step-by-step guide on how to create scheduled emails in Google Analytics. This will allow you to send out monthly reports and other email reports automatically without having to sit at your computer or log into your GA account every time.
Let’s dig in.
- What Are Scheduled Google Analytics Email Reports?
- Why Set Up Google Analytics Email Reports?
- How to Create Automated Email Reports in Google Analytics?
- How to Change Analytics Email Reports
- How to Delete Analytics Email Reports
- Automate Google Analytics Reporting with Databox
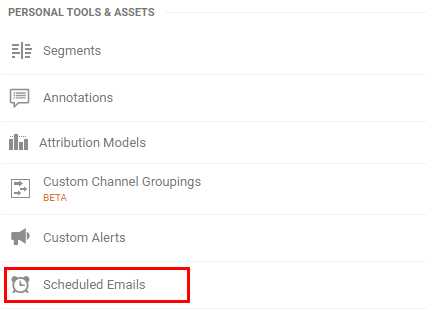
What Are Scheduled Google Analytics Email Reports?
Google has a feature called “Scheduled Emails” which allows users to schedule email campaigns in advance without needing access to their Google Analytics account.
This means that if someone else wants an analytics report sent directly from your Google Analytics account (without giving them login access) then they can simply subscribe themselves as a user with specific permissions and allow those scheduled emails through Gmail or another email service provider like MailChimp.
Google Analytics email reports enable you to automate the process of sending your Google Analytics report data. You can send an email with a snapshot of your custom-selected account (profile) or site (view).
A common use case example where this feature comes into play involves an agency working on client projects and reporting progress by sharing specific Google Analytics reports with the client. Additionally, you can incorporate scheduled reports in Salesforce into this process.
This is possible because scheduled emails are enabled for each account (profile) within your web property, which means that users do not have to log into the analytics dashboard every single day or week in order to check on progress and send an update email. Instead, you can set up a schedule at the beginning of this process so that data will be automatically sent out exactly when you want it without any additional work necessary from either party involved in sending these reports.
Why Set Up Google Analytics Email Reports?
Here are just a few of the benefits that you can look forward to when setting up scheduled Google Analytics email reports:
- No more logging into your analytics dashboard. Instead, schedule emails to be sent out on your own terms so there’s no delay in getting information to where it needs to go.
- Increased security for account administrators who need access or share login credentials with third parties they may not trust completely (such as freelance web developers). This is ideal if weekly marketing reporting updates between teams working on SEO projects together are necessary but don’t want anyone else gaining unauthorized access before this designated time frame.
- Ability to track data over time for longer periods of analysis. By scheduling automated email alerts via Gmail, you can collect and store data over a period of time that extends beyond the typical window users have for reviewing reports within their Google Analytics dashboard.
- Ability to export and analyze data. You can save complete copies of your report snapshot to work with outside your original analytics account (profile). This is helpful if you want to compare two separate websites or track progress on multiple clients’ projects more efficiently than updating each one manually every week.
- Bounce rate and sessions data for more accurate reports. Scheduled emails give you access to the latest bounce rate and session data, whereas standard Google Analytics email alerts only include a limited snapshot of these metrics from within your dashboard at that specific moment in time when they were initially viewed.
- Link performance data for more accurate reports. You can also get link data in your scheduled Google Analytics email report that is not available when viewing results within the dashboard itself. This provides a better snapshot of how users are engaging with specific links on your sites so you can adjust accordingly to avoid issues down the road if necessary.
- Email opens are recorded for more accurate reports. You can also use the link within the scheduled Google Analytics email report to see how many times your emails have been opened, which gives you a better idea of whether or not users are actually checking out these results in their inboxes every time they’re sent out automatically. This is helpful if you want to pinpoint specific issues with certain messages being delivered so that adjustments can be made accordingly down the road.
PRO TIP: Track Your Email Marketing Performance with Ease
Unsure what’s working in your email marketing strategy and what doesn’t? Feeling overwhelmed by data scattered across multiple platforms and reports?
Get a clear and centralized view of your campaign performance with our free email marketing dashboard templates – pre-built with essential metrics and KPIs from the most popular email marketing platforms, all in one place. See what’s working (and what’s not) with your email marketing, optimize campaigns, and maximize your return on investment.
Monitor engagement: Keep tabs on essential metrics such as open rates, click rates, and subscriber growth. Learn how your audience interacts with your emails and optimize your strategies accordingly.
Optimize campaigns: Identify your top-performing campaigns and landing pages with templates such as the Mailchimp Campaign Performance and HubSpot Marketing Performance dashboards. Analyze user activity, conversion rates, and campaign ROI to drive better results.
Understand traffic sources: Dive deep into your traffic data with the Website Acquisition Overview template from Google Analytics 4. Monitor where your users are coming from, their behavior on your site, and how it all ties back to your email campaigns.
Improve deliverability: Track your email delivery rates, open rates, and click rates to ensure your messages are reaching your audience and performing well.

You can easily set it up in just a few clicks – no coding required.
To set up a dashboard, follow these 3 simple steps:
Step 1: Choose a fitting template
Step 2: Connect your data
Step 3: Watch your dashboard populate in seconds
How to Create Automated Email Reports in Google Analytics?
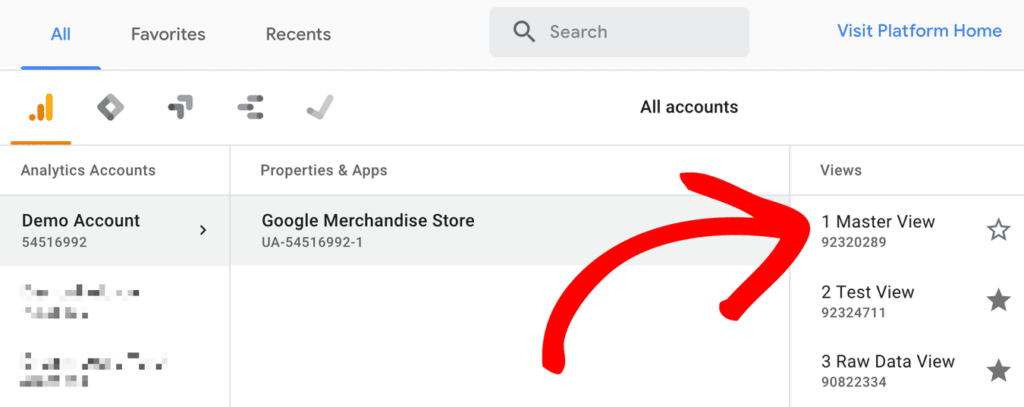
To set up email reports, log into your Google Analytics account and navigate to the Admin tab. From there, select the property and view (profile) that you would like to schedule reports for.
- Once your profile is open, use the pull-down menu next to “Email Reports” in the top navigation bar to select your report preferences.
- You can choose between all available reports within the profile, or if multiple profiles are associated with this web property (such as subdomains), you will be able to set up individual email alerts for each one by selecting “Profile” from the pull-down menu instead.
- Once you’ve selected which type of report data should be sent out via scheduled emails and how often it’s necessary for this information to reach an intended recipient, click on Save Email Preferences at the bottom of this page in order to complete your setup process.
*Note that depending on whether you want a single snapshot per month, week, day, or hour, these automated email reports may take some time before they’re fully processed by Google.
After you’ve saved your report preferences, you can share a link to a specific report that will be sent out on the scheduled date and time.
To do this, navigate back to your Google Analytics dashboard and select “Email Settings” from the top navigation bar. Then click on “Share Current View.”

This is where you’ll see all of the reports currently available for sharing according to the email preferences previously set up within your profile(s). You can either generate a copyable link by selecting Copy Link at the bottom of this page or save these settings as a template so they’re automatically included with each future report you send out via automated emails by clicking Save Template instead.
To do so, select “Profile” from the pull-down menu and then click on Save Email Preferences.
How to Change Analytics Email Reports Preferences
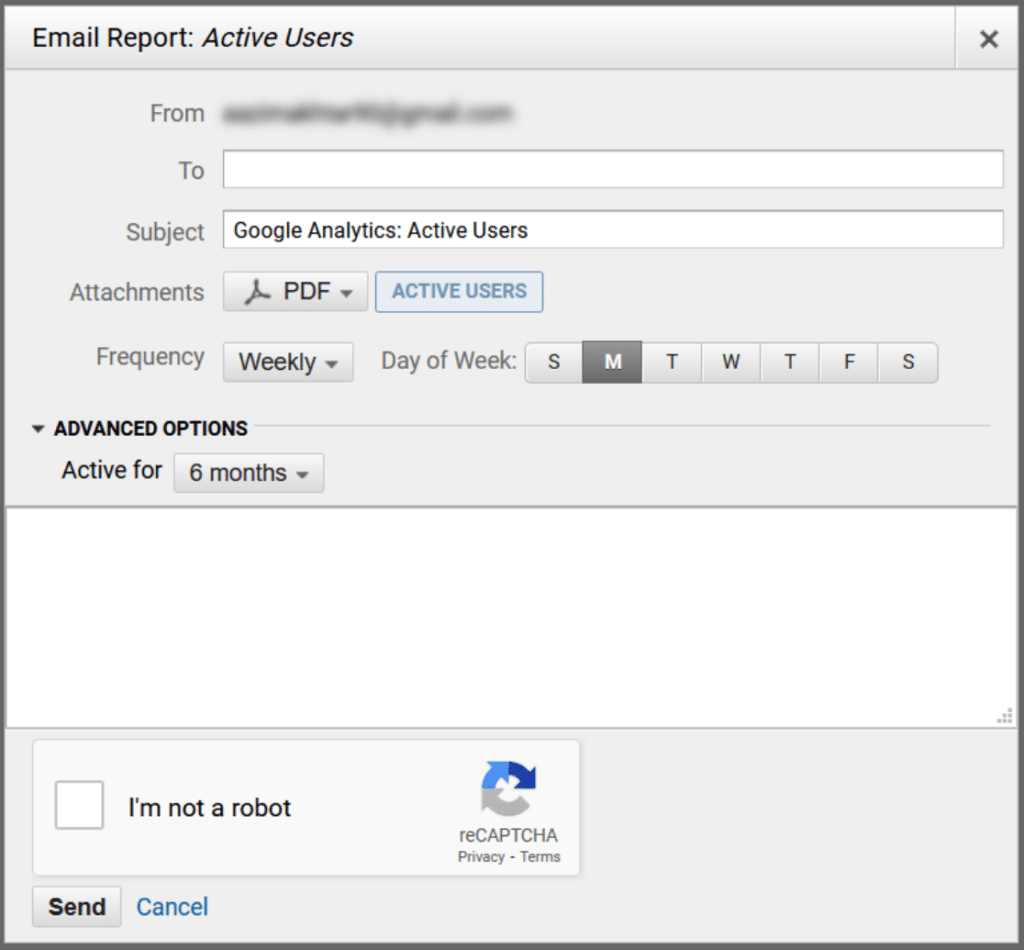
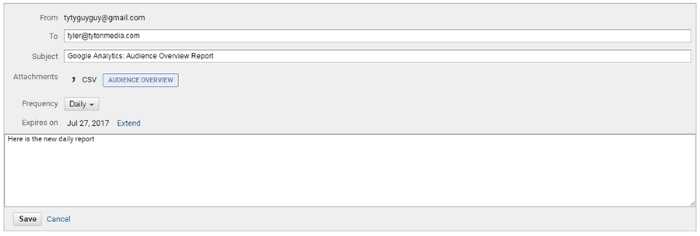
Finally, choose which reports should be included with these scheduled emails and whether or not they will include data from today’s date onwards in order to track progress over time. If applicable, also enter any necessary notification text that would best explain why these particular analytics results are being sent out via Gmail at this given time interval. Clicking OK finishes creating new email alerts! Now all you have left to do is sit back and wait for each one of them to be sent to the email address you’ve designated as a recipient for this automated process.
If alerts aren’t being delivered, it may be because of a formatting issue with your Gmail settings or your Google Analytics account credentials not being properly linked together. To fix this problem and have access restored, simply visit “Admin” within the top toolbar again and select “User Management.” Then click on Edit next to the intended user’s name in order to find their associated permissions under each tab – just make sure that they’re consistent across both accounts! Once everything is set up correctly, all reports will begin processing automatically from now on even if no one is logged into either account during these scheduled times.
To edit email report preferences within an existing Google Analytics account, go back to the “Admin” tab and then use the pull-down menu next to “Email Reports.”
For example, if you want to change a weekly email report’s frequency or turn it off entirely (by deselecting all reports), click on Edit Scheduled Emails.
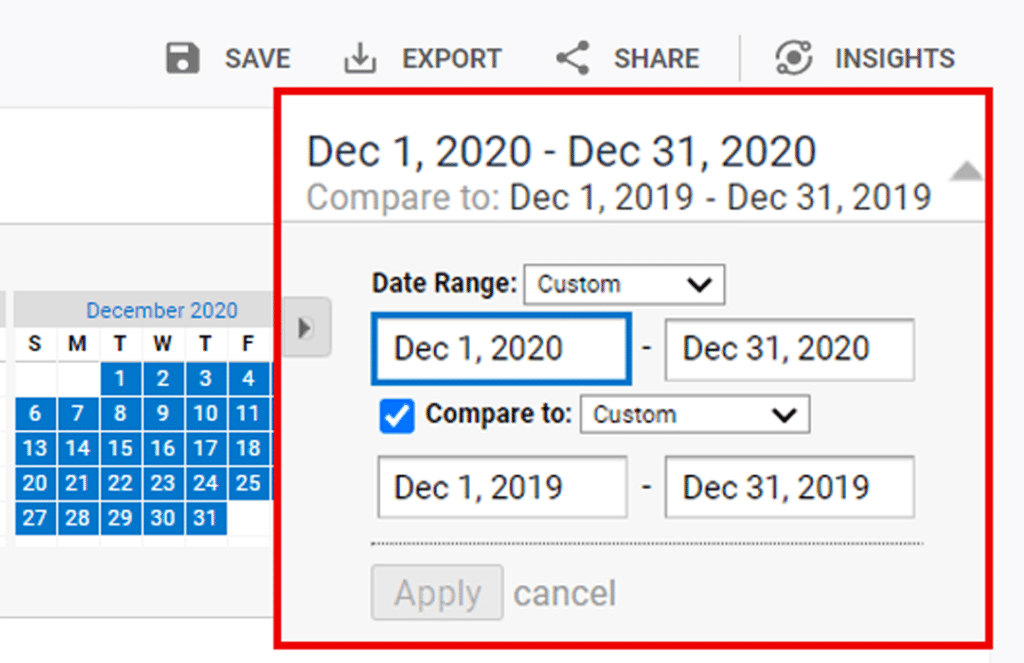
Choose which type of data will be included with these automated emails under Email Frequency and whether or not they’ll include information from today onward via Date Range Options.
In order to finish creating new email alerts, click on Save Email Preferences. In some cases, you may have to wait a few minutes before they’re fully processed by Google as well just like the standard reports do.
You can also edit email report preferences for multiple Google Analytics accounts at once by selecting “Edit Email Preferences” from the pull-down menu next to your current account name.
How to Delete Analytics Email Reports
If you want to delete email reports from your Google Analytics account completely, go back to the “Admin” tab and then use the pull-down menu next to “Email Reports.”

Next, select Delete for each type of automated email you want to stop receiving immediately. Keep in mind that this will also remove any data included with these alerts from their corresponding reports!
By deleting reports, it will also change your email report preferences for this Google Analytics account.
Automate Google Analytics Reporting with Databox
Losing your mind over setting up your Google Analytics account? Don’t have time to set these email reports yourself? Not a big fan of Google Analytics UI? Something else? No problem. You can skip all these tedious steps to setting up automated reports on Google Analytics by opting for Databox instead.
Automate Google Analytics email reports with Databox today and see for yourself why we are one of the best reporting software on the market.