Table of contents
Is there an organization out there nowadays that doesn’t use some kind of an SQL database?
Not very likely.
Love it or hate it, from simple blogs to fortune 500 companies, everyone uses SQL. When data needs to be structured and stored in an organized manner, SQL is very likely the most efficient tool to use.
At the moment, MySQL, PostgreSQL, Microsoft Azure SQL, and Amazon Redshift are supported out of the box on Databox. You have the data ready in your database, now it just needs to get visualized in an easy and concise manner so that everyone – even your boss – can use.
So, let’s get to it!
What Will We Accomplish?
In this article, we will explore MySQL connection setup from the server point of view, then we’ll connect it to Databox and confirm that the connection is working. Lastly, we will create a Datacard visualizing the data. All this without a single line of code – except for the MySQL query, of course 🙂
1. Prepare Your MySQL Database and Host
To get started, you’ll need to allow remote connections from Databox’s public IP 52.4.198.118 to your database. The necessary steps to do that will depend on your database, server infrastructure and firewall. VPC IP must be able to connect to the database port directly.
We will create a user named ‘user’ with permissions to remotely access the database, aptly named ‘mydb’ in our example:
GRANT SELECT ON mydb.* TO 'user'@'52.4.198.118' IDENTIFIED BY 'securePassword';
Note: for simplicity’s sake, we have given this user a SELECT permission on all tables in our database. Permission could be given to select from one table only, or better yet: create a custom view and give permissions to select from this view only. But this is a bit beyond the scope of this document. A basic example on how to achieve this can be read here.
Configure MySQL server to listen on all IPs, as by default it listens on local interface only. Open /etc/my.cnf (sometimes /etc/mysql/my.cnf, depending on linux distro) and check that it contains:
#skip-networking # commented out!
bind-address = 0.0.0.0 # Will listen on all IPs
If you’ve made any changes, restart the mysql server and it’s ready to accept remote connections.
Port 3306/TCP, which is MySQL default port, should be accessible from our VPC IP mentioned above. This must be done on your firewall, Linux iptables example:
iptables -A FORWARD -s 52.4.198.118/32 -p tcp --dport 3306 -j ACCEPT
Note: you might have to substitute FORWARD with INPUT if your Linux box has a public IP and the database runs on the host itself.
Your server should now be successfully set up to accept requests from our IP to your chosen database/table, using chosen user and password.
1.1. SSL Connection (server side setup)
It’s a good practice to secure the connection with a SSL certificate. To accomplish this, certificate must be generated and installed on a server. Here’s a quick guide on how to do this on any recent MySQL version.
We’ll use the OpenSSL command line tools in order not to tie-in with any Linux distribution too closely. Our certificate will also be self-signed, but feel free to use certificates from any certificate authority that is widely known and acknowledged.
First, let’s generate a new CA private key:
openssl genrsa 2048 > ca-key.pem
Now, we’ll generate a certificate. You will be asked some questions. Once done, you’ll have a CA key and a CA certificate:
openssl req -sha1 -new -x509 -nodes -days 3650 -key ca-key.pem > ca-cert.pem
Let’s create a new signing request now, along with a private key:
openssl req -sha1 -newkey rsa:2048 -days 730 -nodes -keyout server-key.pem > server-req.pem
Now, export the private key into a RSA private key:
openssl rsa -in server-key.pem -out server-key.pem
Finally, the server certificate can be created and signed using our CA:
openssl x509 -sha1 -req -in server-req.pem -days 730 -CA ca-cert.pem -CAkey ca-key.pem -set_serial 01 > server-cert.pem
Let’s copy the created files to our MySQL directory:
cp ca-cert.pem server-cert.pem server-key.pem /etc/mysql/
Open up /etc/mysql/my.cnf file and add lines to the [mysqld] compartment:
ssl-ca=/etc/mysql/ca-cert.pem
ssl-cert=/etc/mysql/server-cert.pem
ssl-key=/etc/mysql/server-key.pem
Restart the server for new settings to come into effect.
Let’s create a user that will be allowed to connect only via SSL connection and disallowed otherwise:
GRANT ALL PRIVILEGES ON *.* TO ‘ssluser’@’%’ IDENTIFIED BY ‘SecurePassword’ REQUIRE SSL;
Feel free to restrict the user access further, the above permissions are very lax and just for example. You will probably want to restrict user to our IP only and give it only the SELECT privileges.
Now it’s a good time to test the SSL connection from a mysql client. Again, paste the three lines above to /etc/mysql/my.cnf, but this time in [client] section. Try connecting to the server. If connection succeeded, let’s confirm we’re indeed connected via SSL, by running:
\s
Output will show many lines, but we’re interested in this one:
SSL: Cipher in use is DHE-RSA-AES256-SHA
If “Cipher in use” is present, the SSL connection is working.
If we get a line like:
SSL: Not in use
SSL isn’t active, please go back and re-check all steps or contact support.
2. Connect Your Database to Databox
With our database ready, the next logical step is to connect it and test that it’s returning the data we want.
- Log in to the Databox web application and click on the ‘Data Manager’ tab,
- Go to Available data sources option and find the MySQL tile. At the time of this writing, MySQL is still in beta. You will need to check the Beta checkbox on the bottom right to see it,
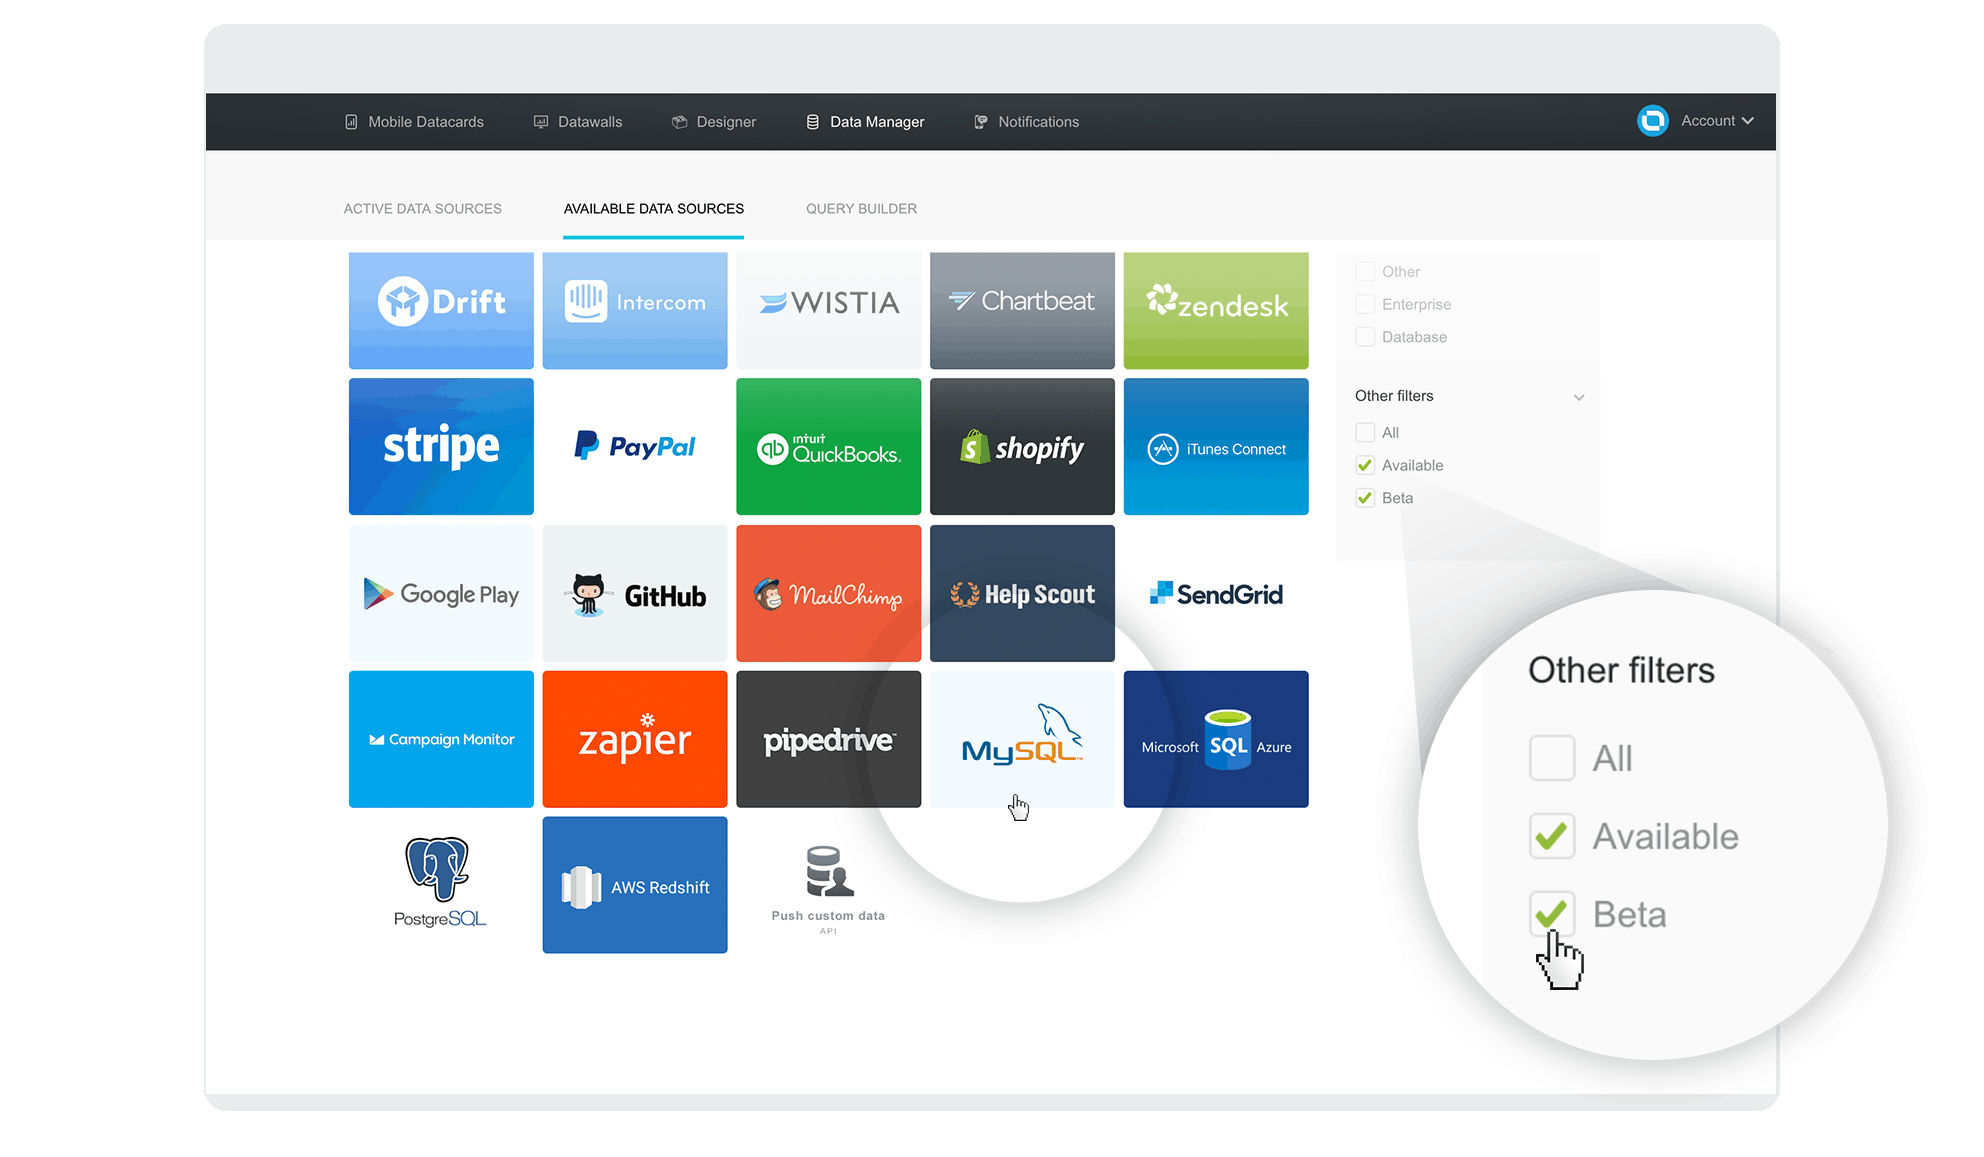
- Hover over it with your mouse and click the ‘Connect’ button that slides up into view
- Enter your connection data in the popup and click the ‘Activate’ button. Default port 3306 is fine in most cases.
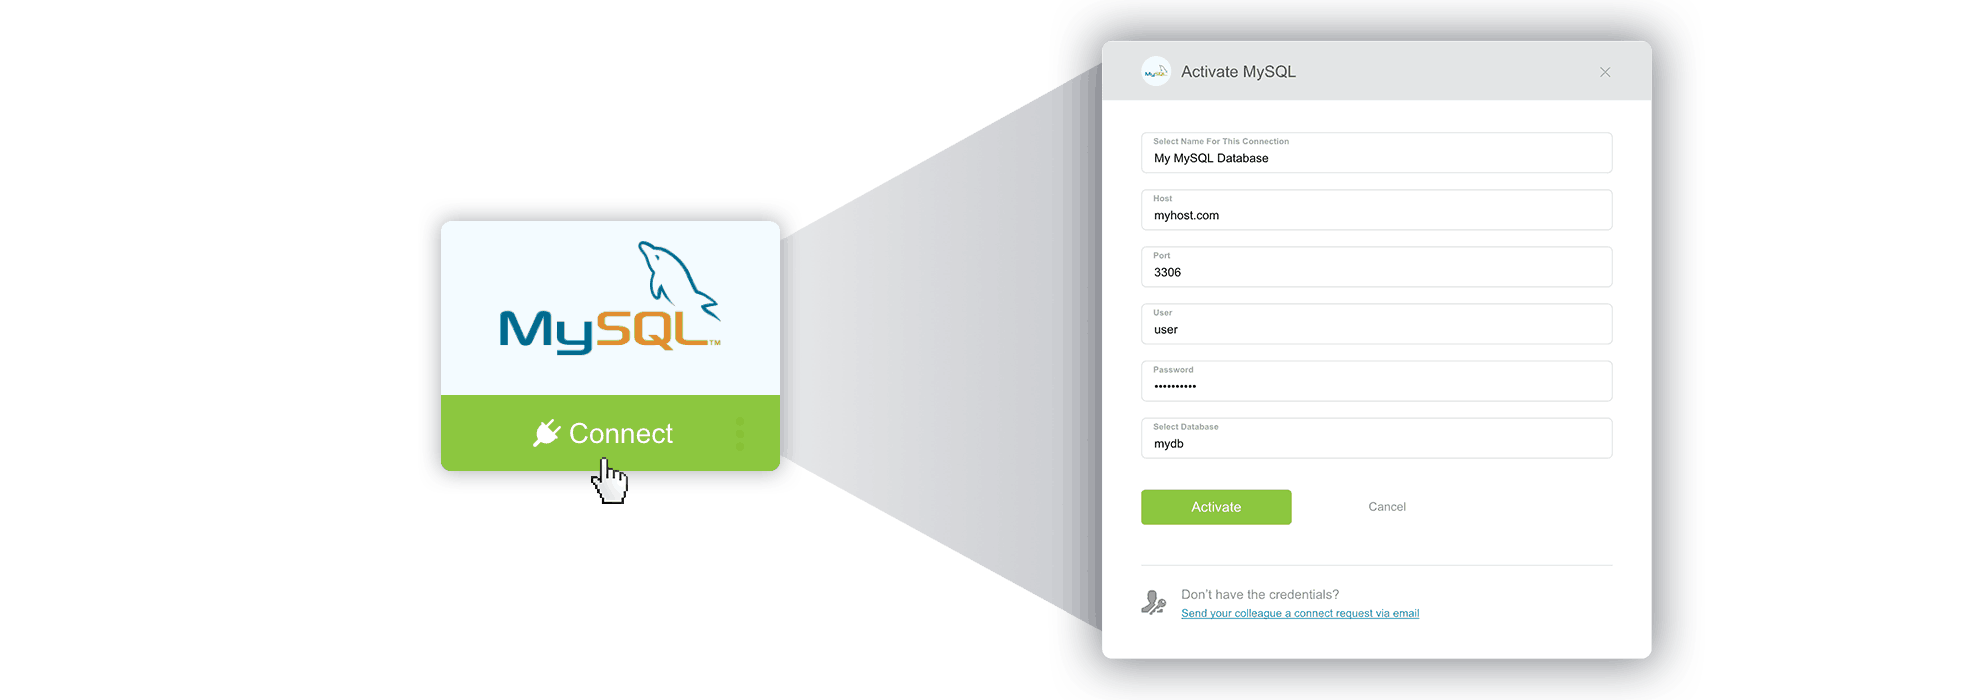
- If all went well, the popup will close shortly and you’ll get a “connected!” message.
Great! We have just successfully connected our database to Databox. In the next step, we’ll write a custom query that will regularly fetch data from your database and make it available for use in any Datacard.
Troubleshooting: If you get a “wrong credentials” message, double-check your user data. If you’re stuck on ‘Activate’ for a minute or so, it’s probably having issues connecting to your database host due to firewall / server / networking issues.
2.1. SSL Setup
Once the mysql client successfully connects to the database and we’re sure SSL is working locally, it’s time to connect via Databox app.
Enter database data, then check the SSL checkbox and paste in the certificates. If using self-signed certificate, be sure to uncheck the “Verify SSL certificate” checkbox or the connection will fail.
Now paste your certificate files content in corresponding fields, SSL CA is not mandatory.
Click Activate and the connection should work. If not, check the error message and contact our support if you can’t resolve it yourself. Be sure the IP or hostname written is publicly available at least to our public IP 52.4.198.118 and is not a private IP.
3. Visualize Your Data with Databox Designer
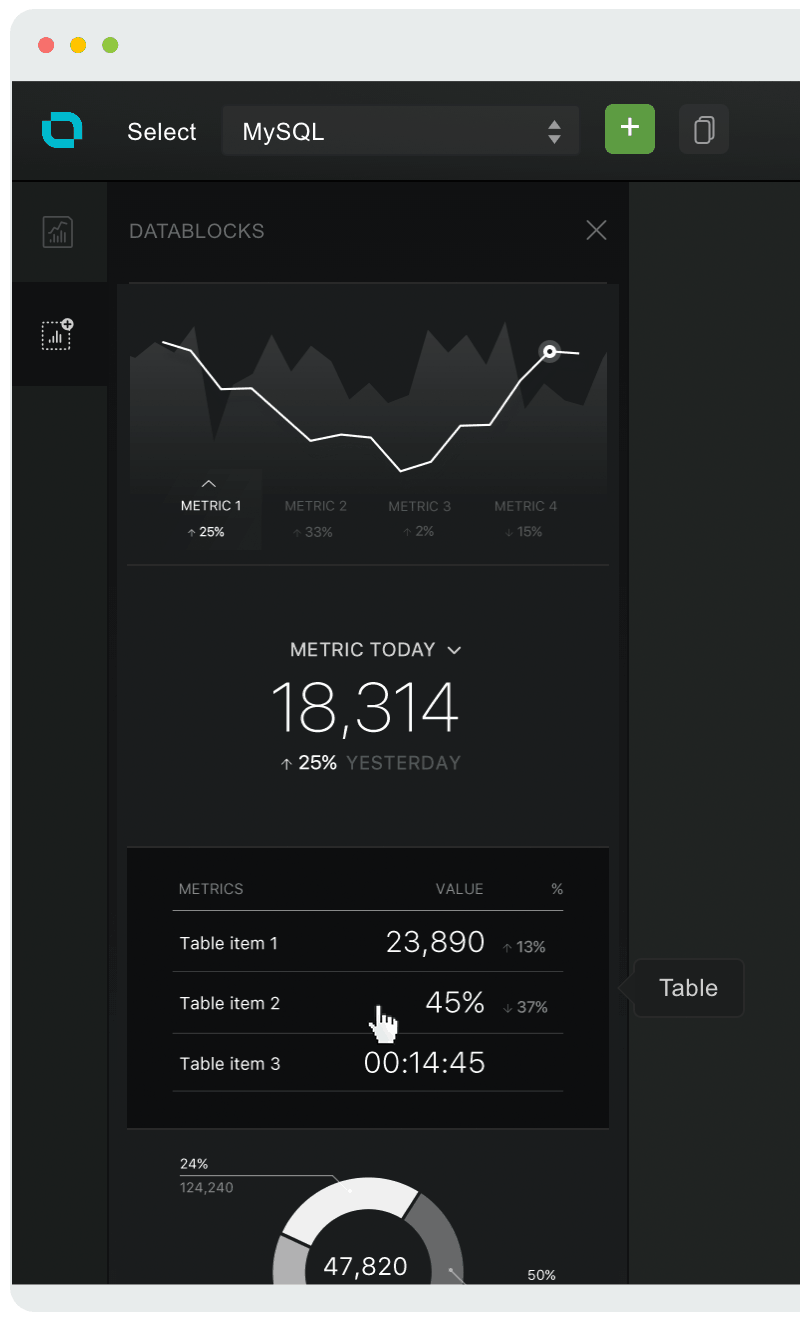
Now that the database is connected, we will use the Designer to query, shape and display the data in a format that’s most appropriate and useful for our needs:
- Choose an existing Datacard or create a new one (how?)
- Choose Datablocks icon on the left
- Drag & drop the Table block onto your Datacard
- For our example, where we will have a dynamic table (the pushed metric key has attributes/lines), we will switch to gather data from ‘Single metric’ in the properties panel on the right
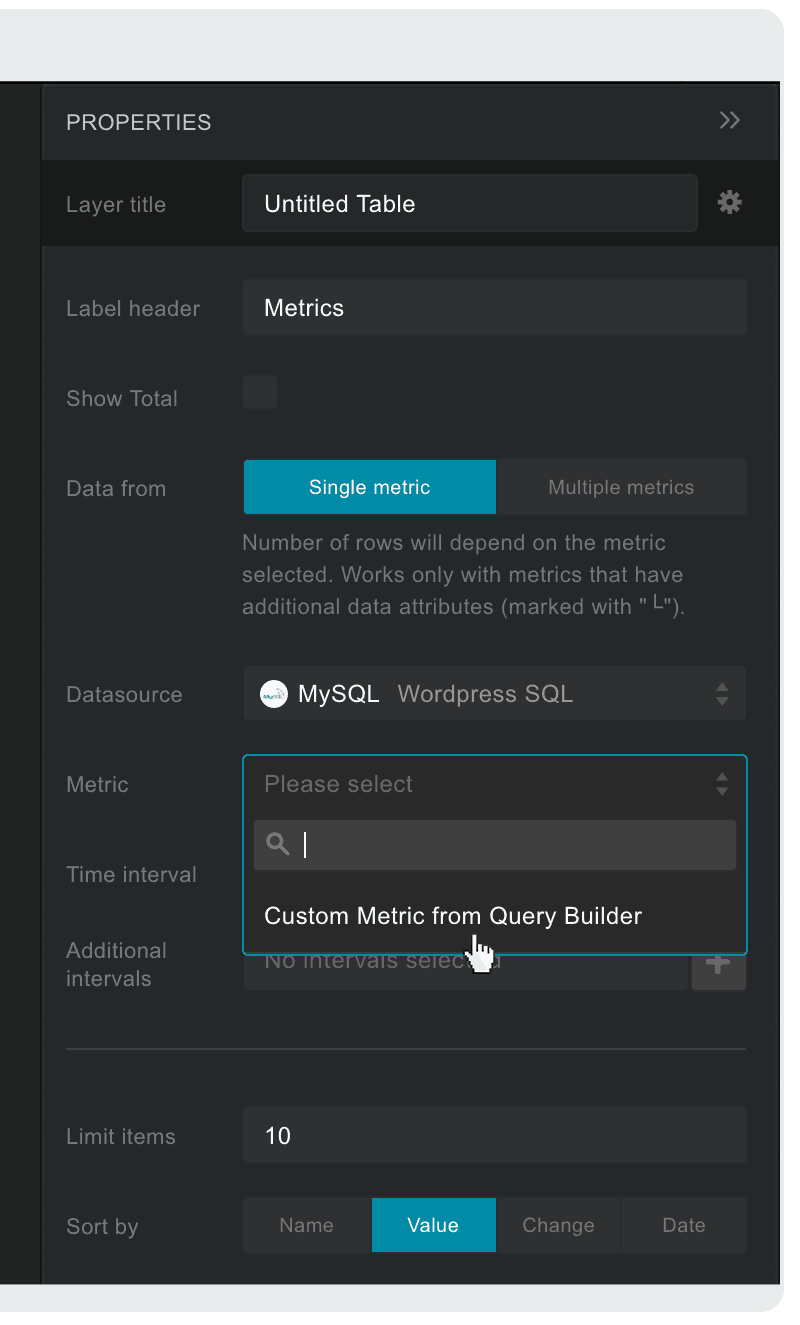
- Select your newly created MySQL data source from the Datasource dropdown on the right
- Click on the Metric dropdown below Datasource and choose ‘Custom Metric from ‘Metric Builder’
- Write your SQL query in a popup window that appears. For this example, we will connect to a WordPress MySQL with a basic query that returns a list of WordPress authors with their post count:
SELECT COUNT(p.ID) AS posts, u.display_name, p.date AS date
FROM dbwp_users u, dbwp_posts p
WHERE p.post_author = u.ID AND p.post_type = 'post'
GROUP BY u.ID
- Now click on ‘Show Data,’ below. Your query result should now be displayed at the bottom, similar to this, depending on your data, of course:
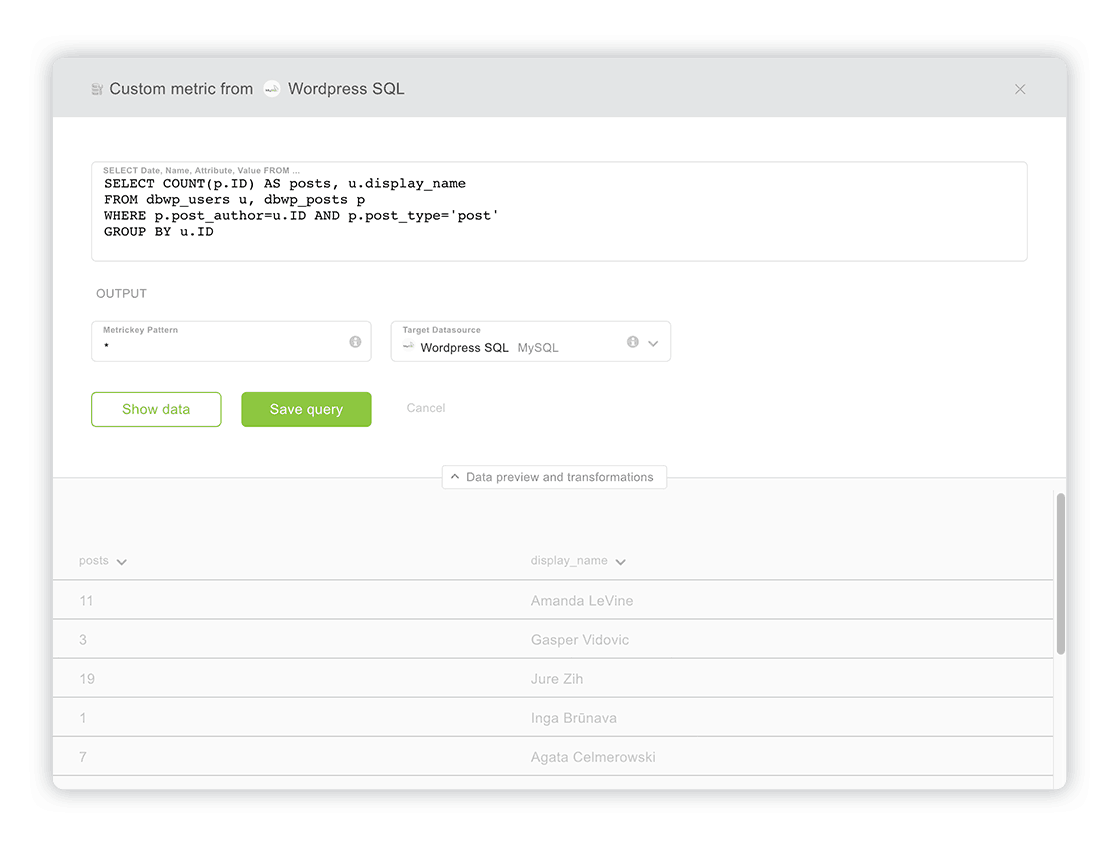
- (optional) You can rename each column (which will become a metric key in Databox), by clicking on the arrow beside it and typing in a new name.
- (optional) You can enter a different metric key name pattern or just leaving the asterisk (*), which will create a metric key with the same name as pushed. By default the output (target datasource, where the data gets pushed to), is already selected and is the same as your source data connection. You can use other tokens if needed.
- Once you are satisfied with the data you see, just click ‘Save Query.’
- Tada! After you saved your custom query, you should see the data on the table. If not, check if the right data source and metric are selected. In our example it’s the ‘WordPress SQL’ data source and ‘└ posts|name’ metric, because we’re pushing posts by names. The time interval should be set to ‘Today,’ to see the latest data.
We have just written a custom MySQL query and displayed its results. Databox will continuously, each hour, fetch data from this resource and store it in the selected target data source (in our example ‘WordPress SQL’).
Writing Queries Basics
Each query must contain a date column containing a valid date, named date. Let’s take a following SQL query for example:
SELECT salary_date AS date, salary FROM employees
In table employees we have a date column named salary_date. As Databox expects column with a name date, we select our salary_date column as date.
Salary is another column, containing a number, column name will be pushed as metric key named salary. This query is valid and can be pushed to Databox.
Troubleshooting: If you don’t see any data, double-check your SQL query, try it directly on your database. If it’s not displaying results there, you have an error somewhere in your query. Also check that MySQL user has necessary permissions to access the database from Databox IP.
Well done! Your database is now connected to Databox, queries can be executed and then displayed on your mobile / big screen / computer.
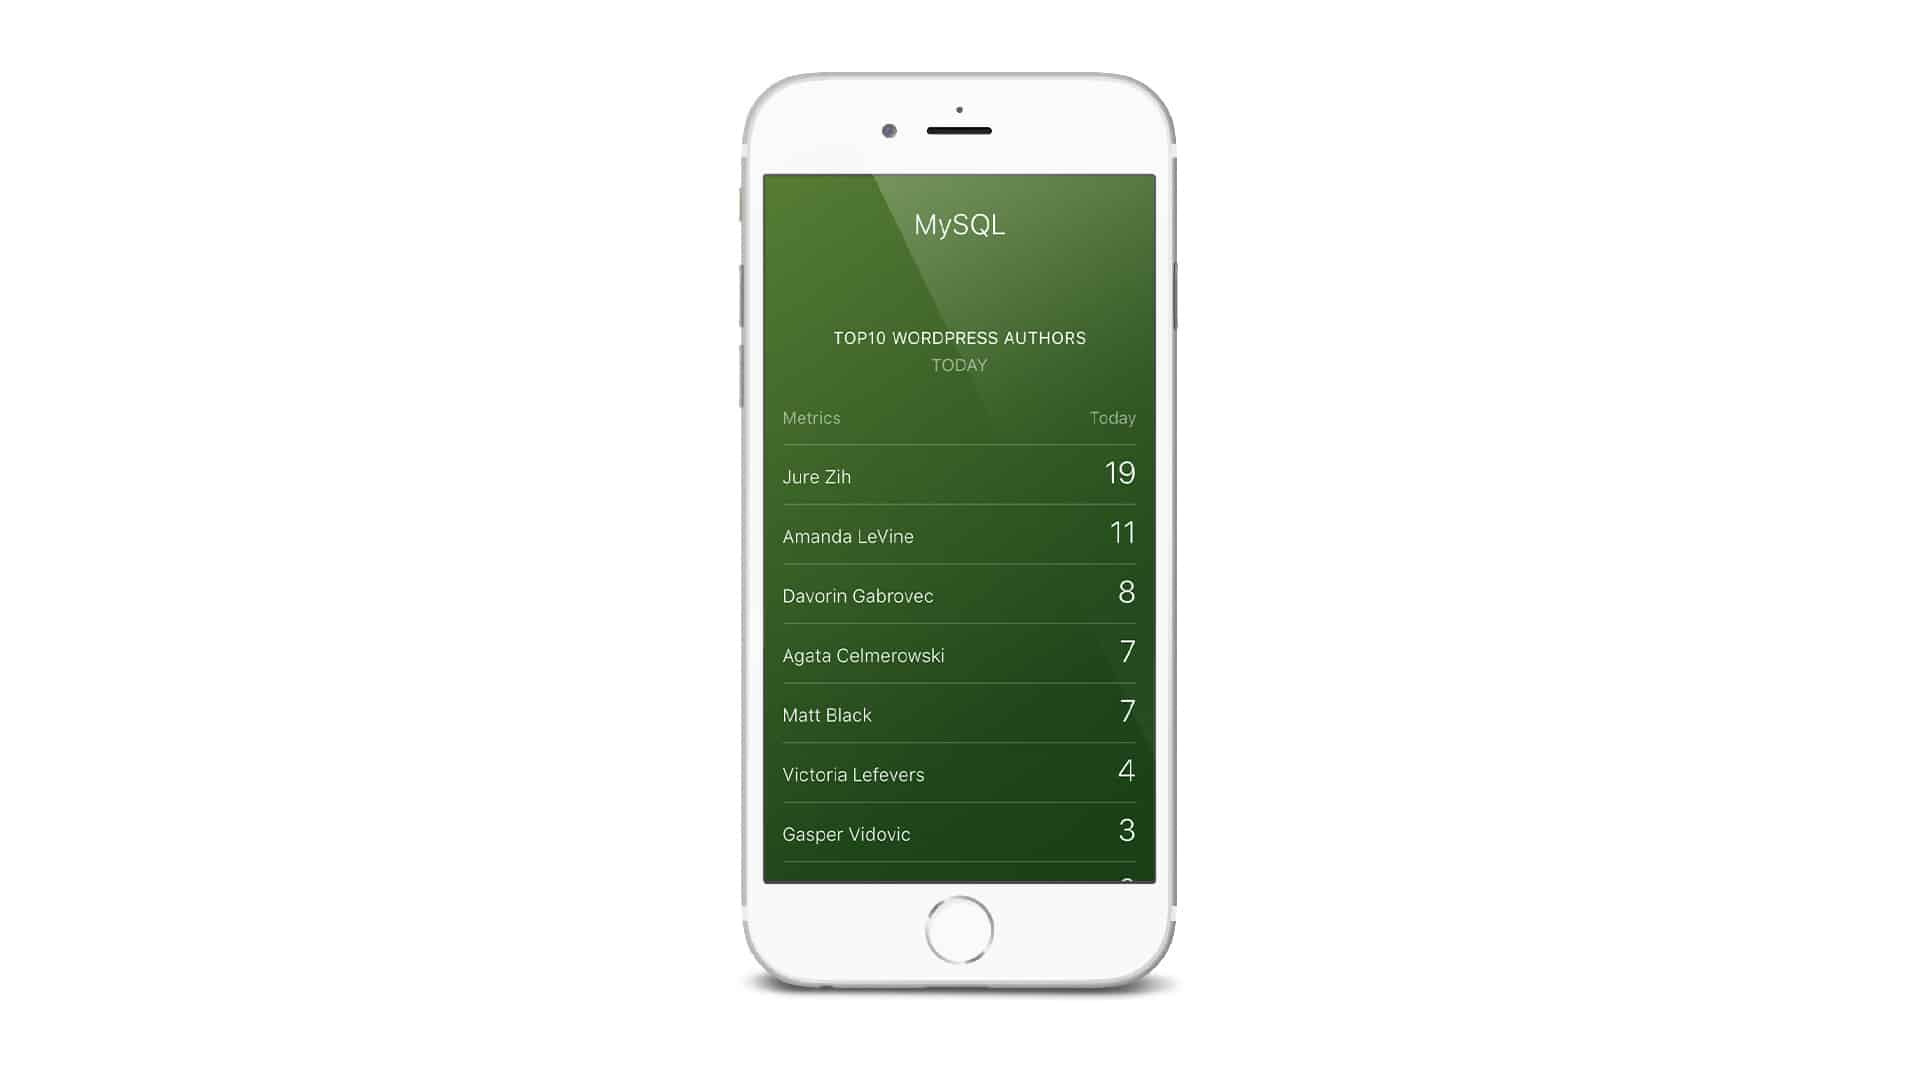
Go ahead and explore further. Add more queries, add blocks, explore different types of visualizations. Make that perfect Datacard (or Datawall of course) you always needed but didn’t know how to get. Now you can! Clean and professional, right at your fingertips. Only data that matters, without clutter. The possibilities are truly endless.
Ready to try it for yourself? Signup for free today and let us know how it went for you.
Remember: we’re always glad to help if you run into any obstacles!


